Tuesday, June 1, 2010

Garden Fresh Tomato Soup!!


Recipe for Garden Fresh Tomato Soup:

4 c. chopped tomatoes
2 cloves of garlic, chopped
half an onion, sliced
2 whole cloves (not garlic)
3 tbs. chopped fresh basil
2 cups chicken broth ( i use a little more)
2 tbs. butter
2 tbs. flour
1 tsp. kosher salt
1 tsp. fresh ground black pepper
1-2 tsp. sugar or to taste (takes away the bitterness of the tomatoes)
splash of milk (optional)

Saute onion and garlic in a little olive oil. Add chopped tomatoes and bring to a boil. Add stock. 20 min. Add chopped basil and remove from heat. Run through a food mill ( I used a food processor in batches).
In the now empty stockpot, melt the butter over med. heat. Stir in the flour to make a roux, cooking until the roux is a medium brown. Gradually whisk in a bit of the tomato mixture, so that no lumps form, then stir the rest. I add a splash of milk. It gives it the creamy "look" with out all of the fat from using cream. Season with sugar, salt, and fresh pepper and adjust to taste. Can sprinkle with a little Parmesan if desired too. :)

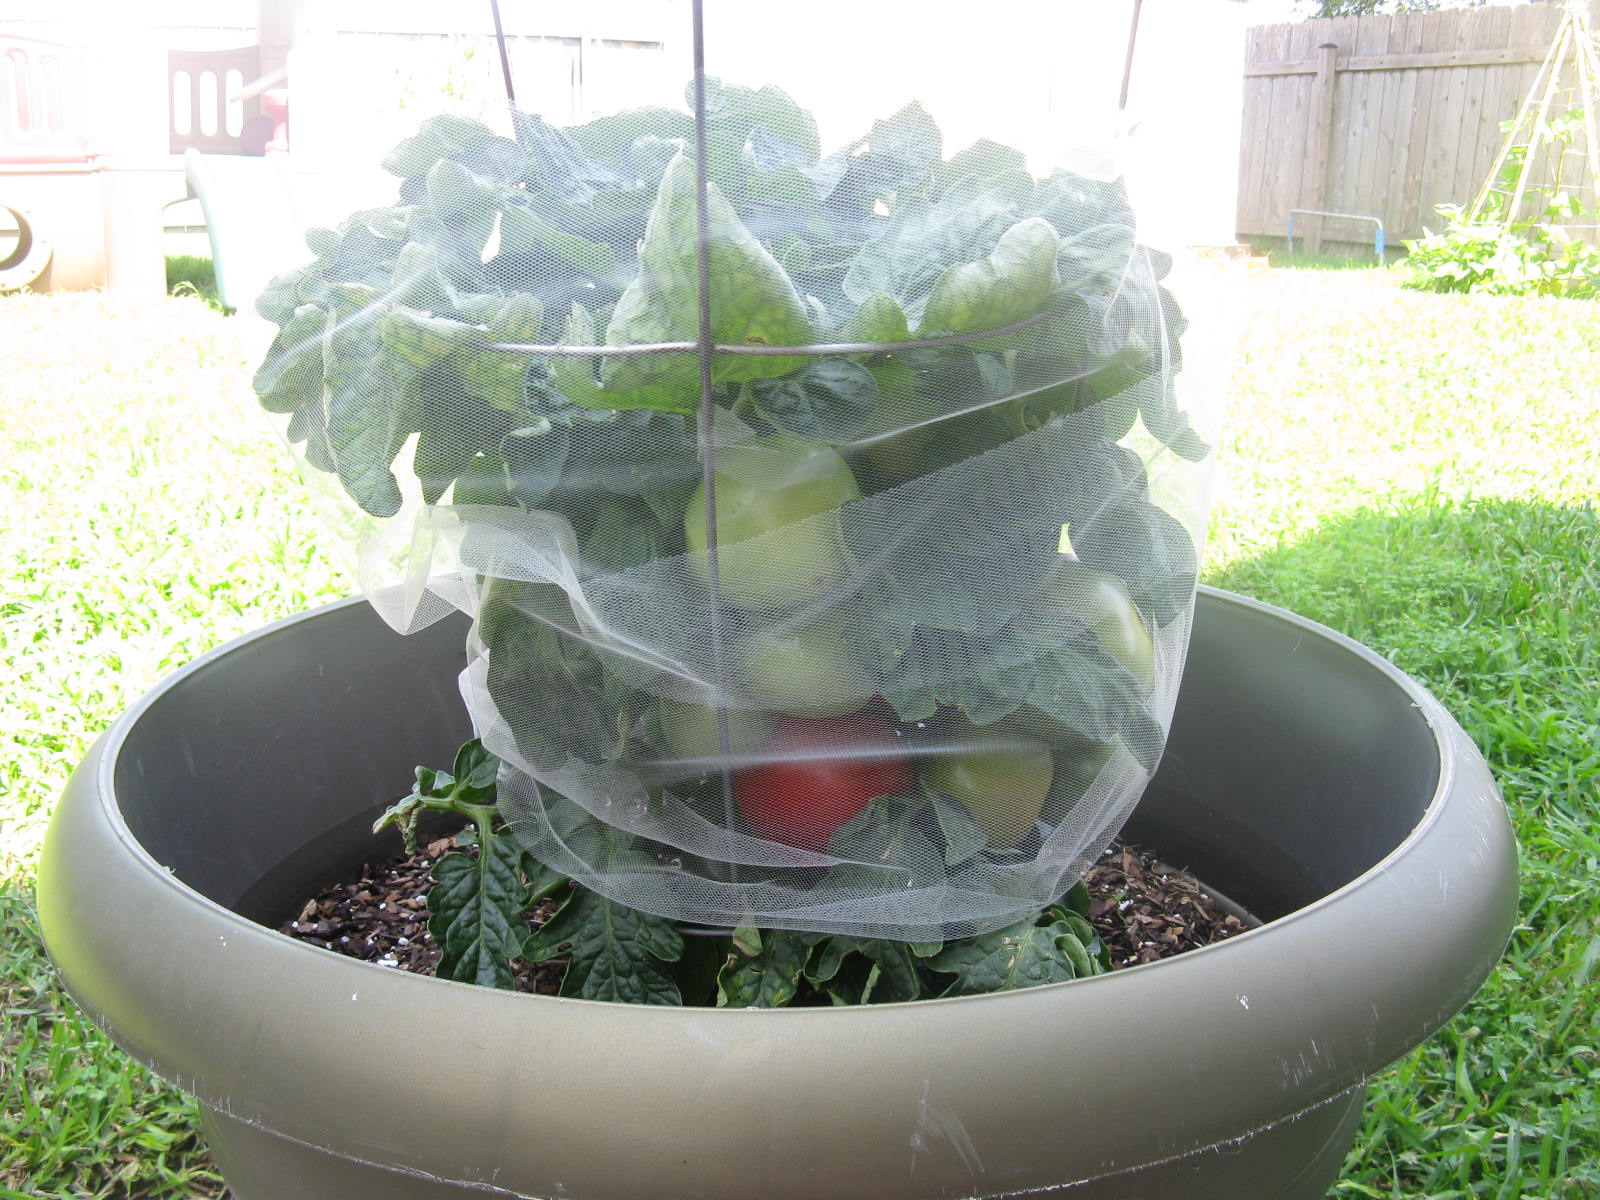
How to keep the birds off of the tomatoes!


There is nothing more aggravating than to walk outside and see your tomatoes half eaten by the birds!! I have finally figured out a way to keep them off. You can fork out the money and buy some bird netting to lay over your plants.
I found a cheaper, more effective way to keep them off. I went to Michael's and bought some "tulle" used to decorate for weddings etc. I wrapped it around my plants when they looked like they were about to turn red and ripen. The plant can breathe and get sunlight through it as well. I also put up a bird feeder on the other side of my yard to make sure they are eating the seeds instead of my veggies. Working so far! :)

Updates from the Garden! June 2010

These sweet peppers are the biggest ones I've ever grown! They start out green and ripen red. I can't wait to cook with these :)


Green Beans!! I have a bowl full of beans and many more to come off of these plants!


Eggplants!!!


The jalepeno peppers are growing like crazy! I have dozens more still left on my plants! Justin made some roasted jalepeno cheese poppers with these for Memorial Day.


Stretching the Dollar and Saving the Seeds! June 2010


My goal for this year is to save as many seeds as possible from this year's production. I began vegetable gardening a few years back not to save money but because i enjoyed it. A friend asked me several weeks ago, "Are you actually saving a lot of money by growing your own veggies?". At the time my answer was, "A little bit."

I decided at that moment that was going to be my goal for this year! In the past I would spend a good bit of money on buying rich soil, buying the seeds or plants, and organic natural insecticides. I now have my own compost so I'm hoping that I won't have to buy anymore soil. To stretch the dollar even further, I started saving seeds from the plants to use for next year's harvest.

How do you save the seeds?

If your herbs are seasonal (meaning they don't last all year due to temperature variances), they should flower before they die off. At this point, don't pull up the plant. Wait until the flowers look like they are dying. When the flowers look dead and dry, pick them off. If you pull the dry, dead leaves apart you should be able to find several little seeds inside each flower. If they are really dry all you should have to do is give the flower a shake and the seeds should fall out into your hand. Store them in an envelope or a brown paper lunch bag and label it. The next time spring or fall rolls around you can plant the seeds.

If you plan on saving seeds from produce, simply open the fruit or veggies and take out the seeds. Put the seeds on a paper towel on your counter for a few days to let them dry out. Once completely dried, you can store them as you would the herb seeds. I bought an orange flesh melon (kind of a mix bt a cantaloupe and a honey dew melon) from Whole Foods last year. I scraped the seeds out and saved them. The boys planted them a few weeks ago, and the plants are looking great!


In this picture, the big flower on the right is from my dill plant which is about to die off. If you look closely you can see the brown seeds :)

Tuesday, May 11, 2010

May - How to start your own garden

When planning your garden, it’s better to start too small than to start too large. In order to enjoy your garden, you must be able to control it. I started a few years back with a garden that was 5 ft. x 5ft. and have slowly expanded it every year.
Choosing a sight: Vegetables and most herbs need at least 5-6 hours of sunlight a day. If you have a place in mind go outside at different times in the day and write down how much sun it gets. Spots you may have thought that got a lot of sun might be shaded by nearby fences, sheds, and trees. You also need to make sure the sight is with in reach of a hose for watering.
I bought cylinder blocks from Home Depot to line the garden. I did this for 3 reasons it was cheap, it will help keep the weeds and grass from growing in the garden, and you can plant herbs, smaller plants, and strawberries in the holes too.
Using a shovel I tilled up the ground removing all of the grass roots and weeds. I lined my space with the cylinder blocks. I added a few bags of garden soil and organic compost from Charvet's. I worked these bags into the soil that was already there. That's it!

There are summer vegetables and winter vegetables. The best time to plant your summer crop is in April and the best time to plant the winter crops is in September/October.
Some summer crops that grow well down here are:
corn, melons, beans, tomatoes, squash, zucchini, eggplants, peppers, and okra
Some cooler weather crops are:
lettuce (One of the easiest things to grow! I bought a $3 pack of organic "bronze arrow lettuce" seeds last fall from Whole Foods. I planted them and did nothing to them!! We had a wet winter so I didn't even water them! We had so much lettuce we were giving it away like crazy!)
broccoli, cauliflower, turnip greens, mustard greens, green onions.

May - Herbs


If you like to cook and want to start your own garden, herbs are the best to start with! Herbs are so pricey when bought in the stores. You by them only for them to go bad in your refrigerator before you use them. You can start with containers, make a small garden, or just throw in some herbs in your flower beds.
These are some of the herbs I have experimented with:
basil, sage, thyme, oregano, parsley, rosemary, mint, dill, cilantro, and green onions.
Some of these will last year after year down here such as rosemary (which can get big if allowed), oregano, and mint.
Others like the warmer weather and will go to see if it gets too cold. At this time I remove the seeds and save them in a brown paper bag and plant them the next season. Basil is one that likes the warmer weather.
Some of the cooler weather herbs are parsley, dill, and cilantro.
There are endless ways of using your herbs. Here is one of my favorite recipes using herbs and tomatoes from the garden.
Provencal Tomatoes
6 ripe tomatoes
1 1/2 c. fresh white bread crumbs (5 slices crust removed)
2 green onions, white and green parts
1/4 c. minced fresh bail leaves
2 tbs. minced fresh flat-leaf parsley
2 teaspoons minced garlic (2 cloves)
1/2 tsp. minced fresh thyme leaves
kosher salt
freshly ground black pepper (freshly ground is way better!)
1/2 c. Gruyere cheese ( you can use mozzarella or Parmesan instead)
olive oil
Preheat oven 400 degrees. Cut the cores of the tomatoes, removing as little as possible. Cut them in half crosswise and, with your fingers, remove the seeds and juice. Place the tomato halves in a baking dish.
In a bowl, combine the bread crumbs, green onion, basil, parsley, garlic, thyme and tsp. salt. Sprinkle tomato halves generously with salt and pepper. With your hands, fill the cavities and cover the tops of the tomatoes with the bread crumb mixture. Bake for 15 minutes, or until they're tender. Sprinkle with the cheese, drizzle with olive oil, and bake for 30 seconds more. Serve hot or room temp.

May - Eggplants


I have planted eggplants for the past 4 years. The last 2 years I have planted this variety and had such great luck! It is called "Fairy Tale". It stays this color even when it is bigger. I find it not quite as bitter as the darker eggplants. Last year I had about 2 eggplants per week off of only 2 plants for about 3 months straight! Hopefully this year will be just as plentiful :)
Here is one of my favorite eggplant recipes that will help you use up the excess of tomatoes from your garden too.
Eggplant Casserole:
1 eggplant
2 med. tomatoes
2 tbs. butter (for the healthier version, i substitute olive oil)
1/2 c. chopped onion
1 tbs. parsley
1tsp. salt
pepper
dash of sugar
1/4 c. bread crumbs
1/4 c. parmesan cheese (fresh grated is the best!)
preheat oven 350degrees. peel eggplant and cut into 1/2" cubes. cook in boiling salted water for 5 min. and drain. immerse tomatoes in boiling water for 2 min. and drain. remove skin and chop. melt 2 tbs. butter in skillet add onion. cook till slightly tender. mix eggplant, tomato, onion, parsley, salt and pepper. pour into 1 1/2 quart dish. Mix a little melted butter (or olive oil) with bread crumbs and parmesan cheese. sprinkle over eggplant. bake 20-25 minutes.